What is Rytr? What is it used for?
Rytr for beginners: Rytr is an AI-powered writing tool that lets you generate paragraphs, blog posts, marketing emails, social captions, product descriptions, and more in just a few clicks. Its biggest advantages are ease of use, a wide library of ready-made templates (use cases), and quick editing actions—Rephrase, Expand, Shorten, and Continue writing—for fast, polished drafts..
If you’re new to content creation, Rytr can help you:
- Generate ideas and outlines for your articles in minutes.
- Draft blog posts that you can later refine manually.
- Create ad copy, descriptions, emails, and headlines within seconds.
Pro Tip: While AI is powerful, you should always edit manually — add real data, examples, your brand’s voice, and verify accuracy before publishing.
Getting Started with Rytr: Navigating the Interface

To begin using Rytr, visit app.rytr.me and log in to your account. If you don’t have one yet, you can quickly sign up for free.
Step 1 – Personalize Your Experience
When you first log in, Rytr will ask, “What are you here for?” This step helps the system customize your experience.
- If your main goal is to write emails, messages, and replies, select “Writing emails, messages, and replies”.
- If you plan to focus on blog articles, ads, or marketing content, choose “Writing articles and marketing content”.
- You can select both options to get the widest range of suggestions and templates.
After making your selection, click Next to proceed.
Step 2 – Understanding the Dashboard
Once you’re inside, here’s how the interface is organized:
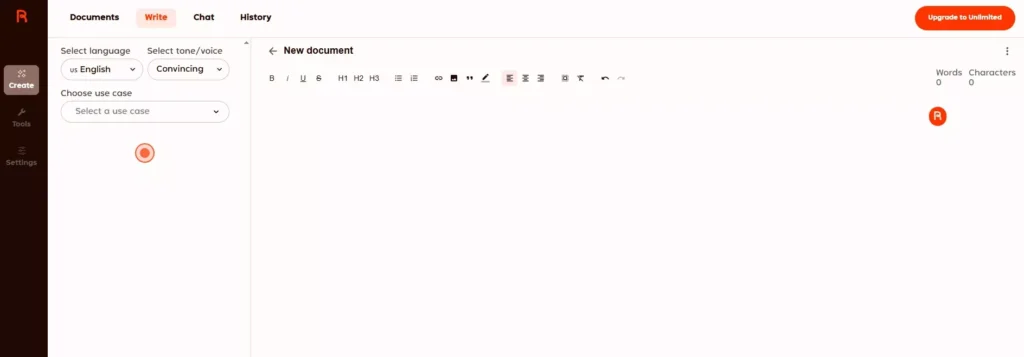
- Top Navigation Bar: You’ll see four main tabs —
- Documents – View and manage all your saved writing projects.
- Write – Start creating new content using Rytr’s AI.
- Chat – Interact with the AI in real time to ask questions, get quick drafts, or brainstorm ideas.
- History – Access all your past generated outputs.
- Left Sidebar: This panel contains key tools and settings —
- Create – Your main writing area where you can set language, tone, use case, and enter prompts.
- Tools – Access extra features like Brand Voice to match your tone across content, and the Plagiarism Checker to ensure originality.
- Settings – Adjust your account preferences, language defaults, and plan details.
Step 3 – Creating Your First Document
Go to the Documents tab, click New Document, and give it a clear title right away (e.g., “Rytr Guide – Draft”). This helps keep your projects organized, especially if you plan to work on multiple articles or campaigns..
8-Step Content Writing Process with Rytr (Beginner-Friendly Guide)
Step 1 – Select the Right Use Case
Go to Write → Choose Use Case. Select the template that matches your goal:
- Blog Idea & Outline – Generate article outlines with H2 and H3 headings.
- Blog Section Writing – Write detailed content for each section of your article.
- AIDA Copywriting – Create ad copy based on the Attention–Interest–Desire–Action model.
- Email, Facebook/Google Ads, Product Description, and more — choose according to your needs.
Step 2 – Set Language, Tone, and Creativity Level
- Language: Choose the output language (e.g., English, Vietnamese, etc.).
- Tone: Select a style such as Friendly, Professional, or Convincing.
- Creativity Level:
- Optimal – Recommended for most writing tasks.
- Low – For high accuracy and minimal AI improvisation.
- High – For more variety and creative ideas.
Step 3 – Enter Keywords & a Clear, Concise Description
In the input box, write 1–3 sentences that include:
- Target audience
- Goal of the content
- Context
- Desired outcome
Add primary keyword(s) if you want to optimize for SEO.
Step 4 – Click “Write” and Choose the Best Draft
- Adjust Variants (2–3) so Rytr generates multiple options.
- Review and select the most suitable version for your needs.
Step 5 – Edit with Magic Commands
Highlight any sentence or paragraph, then use tools like:
- Rephrase – Change wording while keeping meaning.
- Improve – Make the sentence stronger and clearer.
- Simplify – Shorten and make it easier to read.
- Expand – Add more details.
- Shorten – Make it more concise.
- Continue Writing – Let Rytr extend your text.
Repeat until the flow is smooth and meets your expectations.
Step 6 – Standardize the Structure
- Turn lists into bullet points or numbered lists.
- Use H2/H3 headings for clear hierarchy.
- Add tables (e.g., comparisons) in your CMS.
- Include real-life examples or statistics if available.
Step 7 – Check for Plagiarism & Brand Voice
- Use the Plagiarism Checker (in Tools) to ensure originality.
- Use Brand Voice / Sound Like You — upload sample text so Rytr can mimic your writing style.
Step 8 – Publish
Copy your content to your blog or WordPress editor, then:
- Add title tag and meta description.
- Insert image alt text.
- Include a table of contents (TOC).
- Add internal links to relevant pages.
Once finalized, hit Publish.
10 Useful Prompts for Beginners – When & How to Use Them
1. Title Generation
When to use: When you need catchy, SEO-friendly titles that are under 60 characters without clickbait.
Prompt:
Generate 10 H1 ideas under 60 characters for [topic], each including the main keyword once, without using clickbait.
Example: Create 10 H1 titles for “Rytr AI Writing Tool” → Rytr will suggest titles ≤ 60 characters, each containing the main keyword once.
2. Introduction Writing
When to use: To write a short, engaging introduction that previews the content.
Prompt:
Write a 90–120 word introduction that identifies the reader’s problem, explains the benefit of reading, and previews 3 key sections.
Example: For a “Rytr Guide” article, the intro highlights writing struggles, benefits of reading, and 3 main sections.
3. Body Paragraph Creation
When to use: To write informative content with a practical example.
Prompt:
Write a 160-word section with 3 bullet points and 1 practical example. Maintain keyword density of around 1% for [keyword].
Example: Generate a blog section with 3 bullet points plus a real-world example while keeping keyword density optimal.
4. Pros & Cons Comparison
When to use: To make it easy for readers to compare the advantages and disadvantages of a tool or product.
Prompt:
Create a 2-column table (Pros vs. Cons) with 5 concise rows for [tool].
Example: Compare the pros and cons of “Rytr” in a clear 2-column table.
5. Checklist Format
When to use: To turn steps or tips into a quick, scannable checklist.
Prompt:
Convert the following steps into a numbered checklist of 6–8 items, each with no more than 18 words.
Example: Turn a “Blog Writing Process” into a 7-step checklist, each step ≤ 18 words.
6. Call-to-Action (CTA)
When to use: At the end of a section or article to encourage readers to act.
Prompt:
Write a 2-sentence conclusion with a clear call-to-action to [action], using a friendly tone.
Example: End a post by inviting readers to try Rytr with your affiliate link.
7. Quick-Read Optimization
When to use: To make content easy to skim and suitable for online reading habits.
Prompt:
Rewrite this paragraph to make it skimmable. Add subheadings and bullet points where appropriate.
Example: Break a long block of text into short paragraphs, bullets, and subheadings.
8. Multilingual Output
When to use: When you need the same content in multiple languages.
Prompt:
Translate this text into Vietnamese with a friendly yet expert tone, keeping the formatting and headings intact.
Example: Translate an English blog post to Vietnamese while preserving layout and professional tone.
9. E-E-A-T Optimization
When to use: To improve content’s trustworthiness, authority, and SEO ranking.
Prompt:
Enhance this section by adding 2 credible sources (cite in-text) and 1 mini case study example.
Example: Add credible citations and a short real-world example to strengthen the section.
10. Specificity Boost
When to use: When your content is too general and needs precise details.
Prompt:
Replace vague statements with concrete numbers or examples. Remove filler content and keep the section under 150 words.
Example: Change “Rytr helps you write faster” to “Rytr helps you write a 1,000-word blog post in just 15 minutes.”